Your first menu in 5 minutes
Go from sign-up to a live digital menu in about five minutes: add sections and items, pick a theme, publish, and share your link or QR code.
This guide takes you from an empty account to a published menu in about five minutes. Each step links to a more detailed guide if you want to go deeper.
1. Create your account
Sign up, choose the Free Trial, and name your venue. The wizard drops you on your dashboard when you're done. (Full details: Create your account.)
2. Open the Studio editor
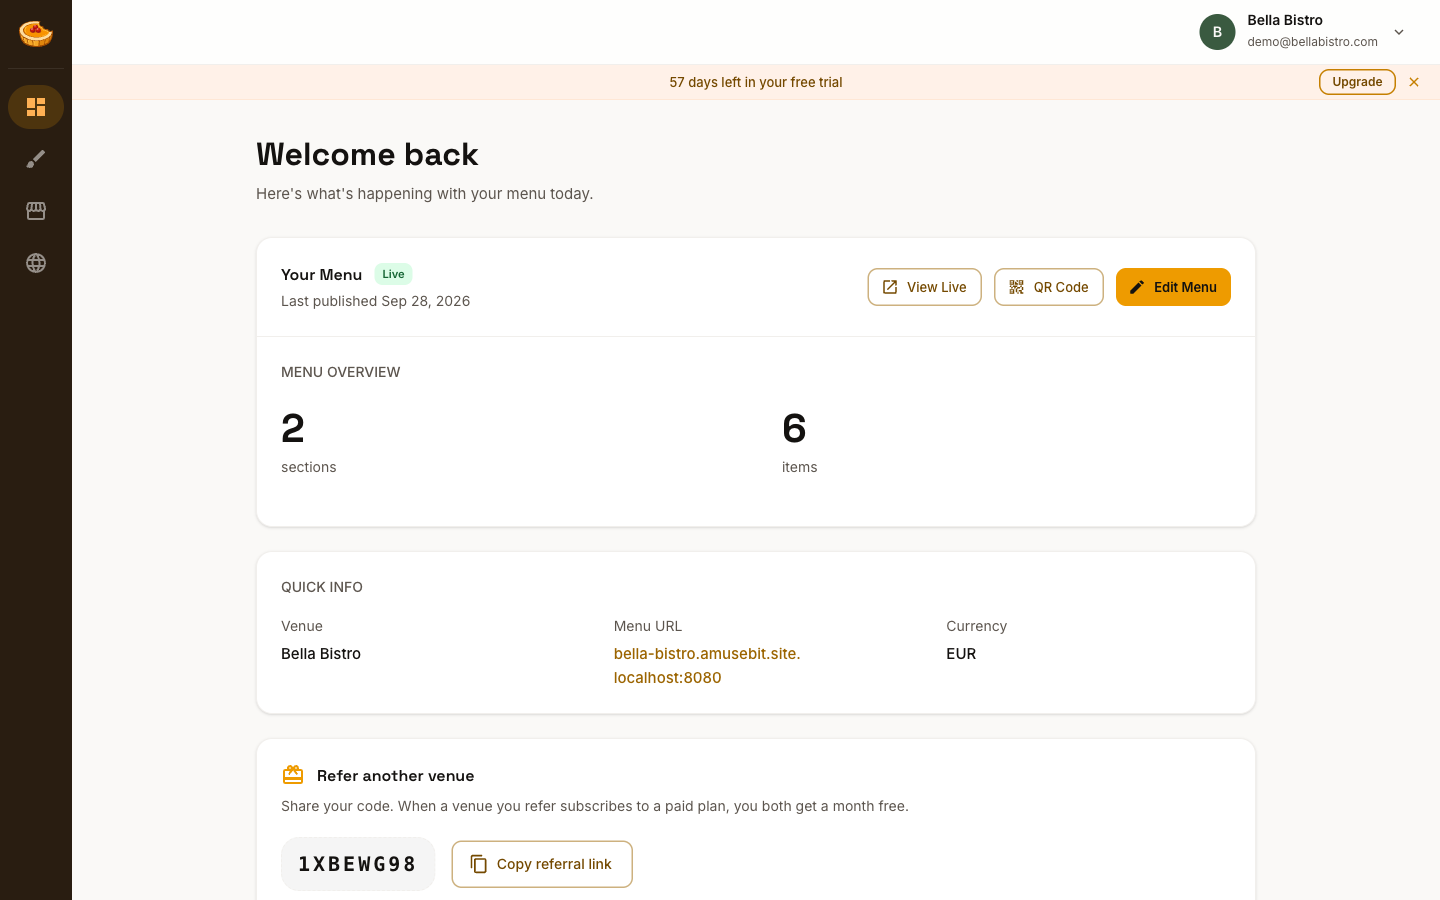
Click Edit Menu on the dashboard (or Studio in the sidebar). The Studio has two modes: Content, where you build your menu, and Styling, where you set the look.
3. Add a section
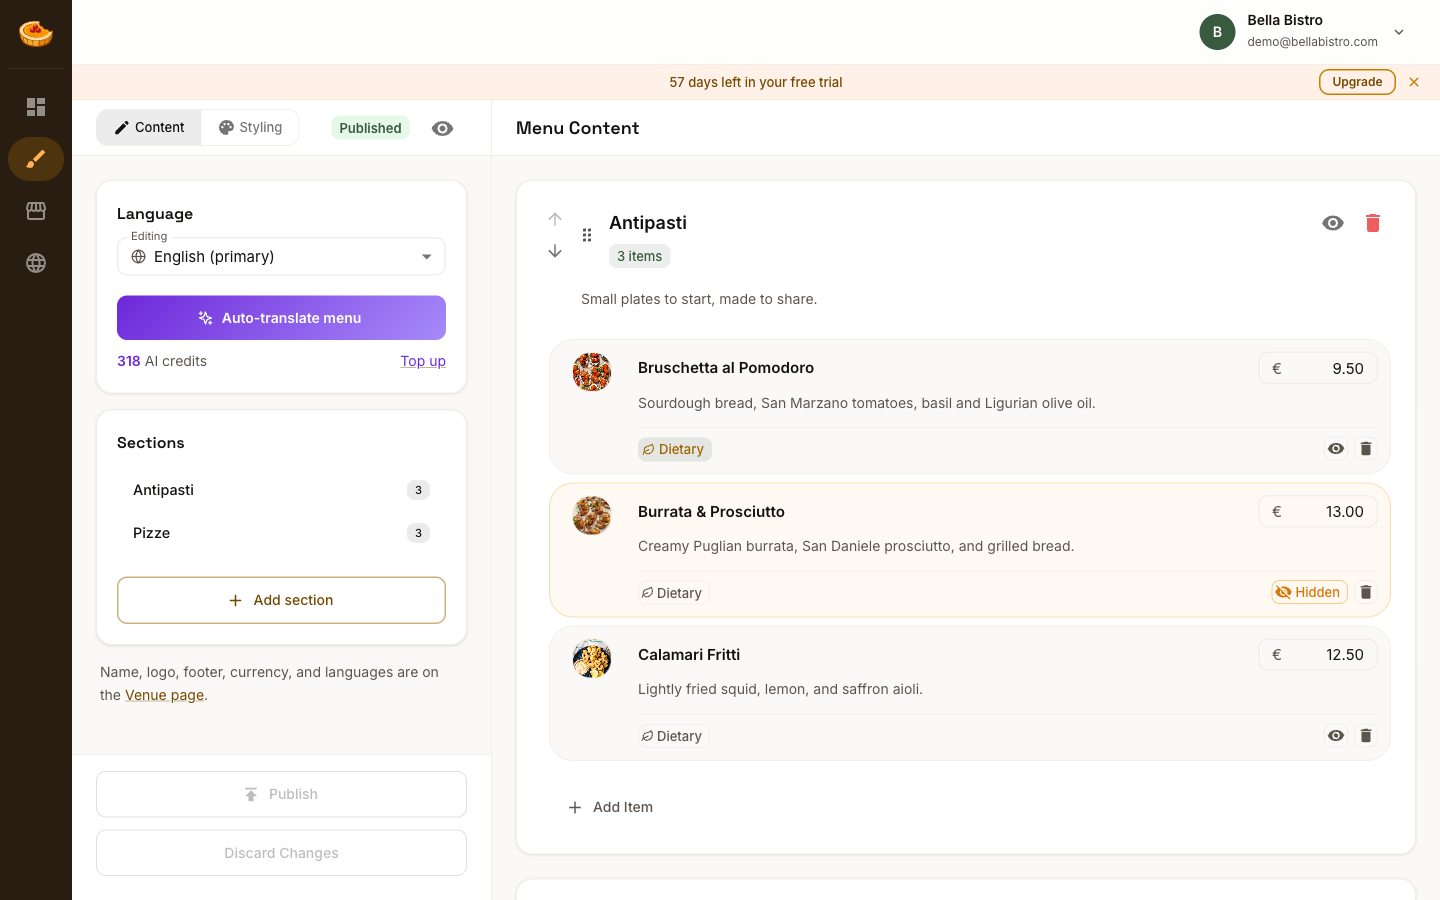
In Content mode, click Add section and give it a name like "Antipasti". Add a short description if you'd like.
4. Add your items
Inside the section, click Add Item, then enter a name, an optional description, and a price. Repeat for each dish. Your changes save automatically as you type.
5. Choose a theme
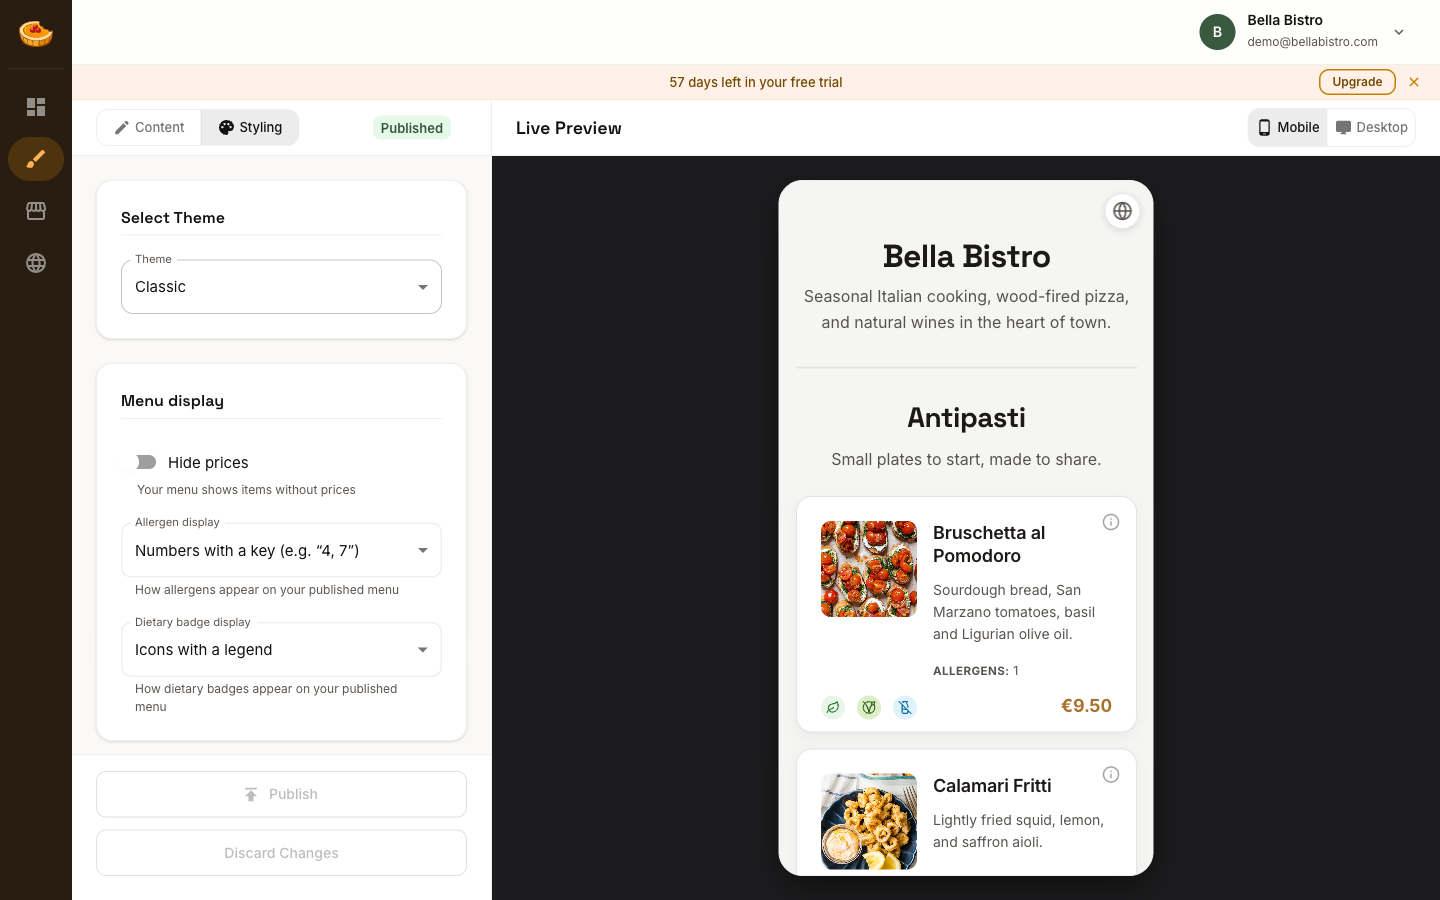
Switch to Styling mode and pick a theme: Classic, Modern, Rustic, or Coastal. Adjust the colors and font if you want, and watch the live preview update as you go.
6. Preview and publish
Use the live preview to check how your menu looks on mobile and desktop. When you're happy, click Publish and confirm. Your menu goes live right away.
7. Share your menu
Your menu is now live at your-venue.amusebit.site. Copy the link from your dashboard and share it with guests, add it to Google, or turn it into a QR code.